I thought it would be great to have wine glasses for each member of my family. So, I set about to do it.
First Step - Purchase a
I picked up mine at our local dollar store. Yay! for dollar store's. Right?
Next, purchase some paint for glass. I highly recommend
these:
I love these paints. The colors are really creamy looking. I know
I'm going to be using these on many more projects. Great value too.
I also purchased
These were nice and on my first experience with glass painting, I only used these.
On the second product I used the silver pen to outline.
Let the fun begin.
One more thing. I got smart the second time around and found these
gel stickers at the dollar store. I didn't know at the time that I would be using them for my glasses but they worked beautifully.

I chose a gel flower for my stencil and slipped it onto
the wine goblet. Then, I outlined the flower.
(it's hard to take a picture of myself while painting. oops.)
Removed the stencil and started to fill in the design with color.
I used a brush. This was easy and fun. Loved it.
Isn't that a gorgeous color?
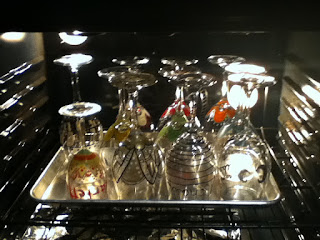
Once they were all just how I wanted them to be I baked them in the oven.
Place the glasses into a cool oven. Close the door and set
the temperature to 350 degree's. Now set your timer for
30 minutes.
When my timer went off. I turned off my oven and left the glasses in the oven.
It was time for bed.
The next morning, I woke up excited to see how my wine glasses had turned out.
I removed them from the oven.
Beautiful!
I shined them all up to get them ready for their photo shoot.
Tada!

Aren't they pretty?
Two more for my son and his girlfriend.
Here's one I made for my niece Scarlett. Her own Princess glass.
Here's a picture of the first ones I made. They have each of our names on the glass.
Have fun creating.
I love and appreciate your comments and questions.


Great idea. What a great blog.
ReplyDeleteThank you. I'm glad you like it.
ReplyDelete